How to prototype a datalist in-place edit
In this example, you will learn how to prototype a data list in-place edit.
Here’s how you build it:
View
- Go to the Data Masters palette and create a new “Data master”, name it “Data edit”, and create one attribute called “Name”, then press “Ok”.
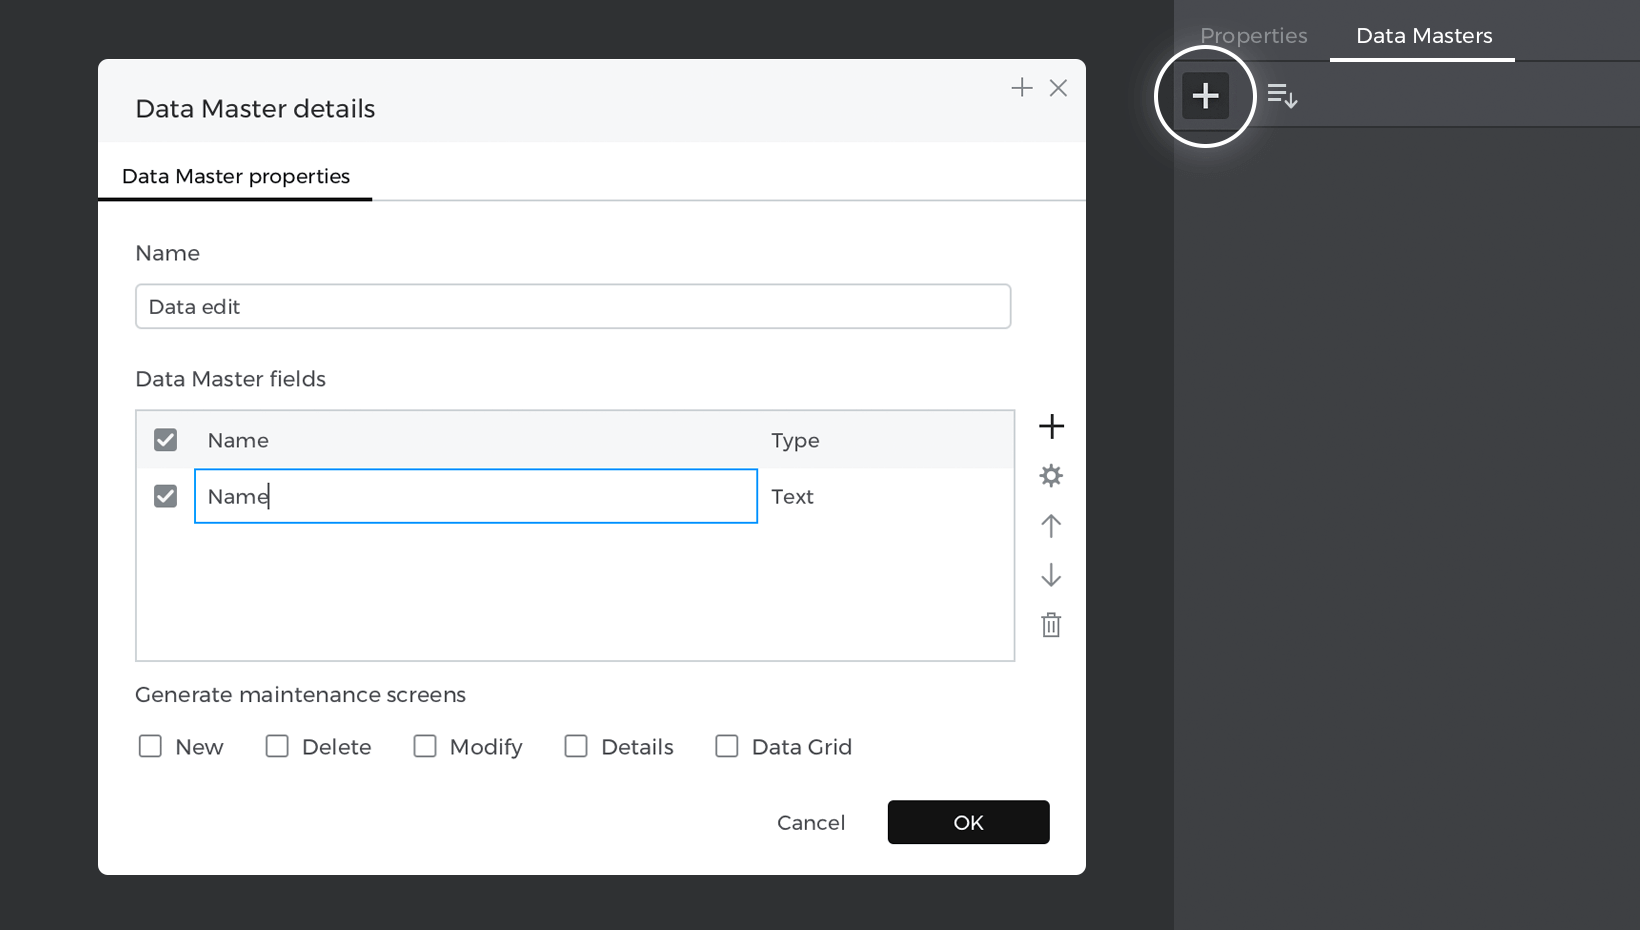
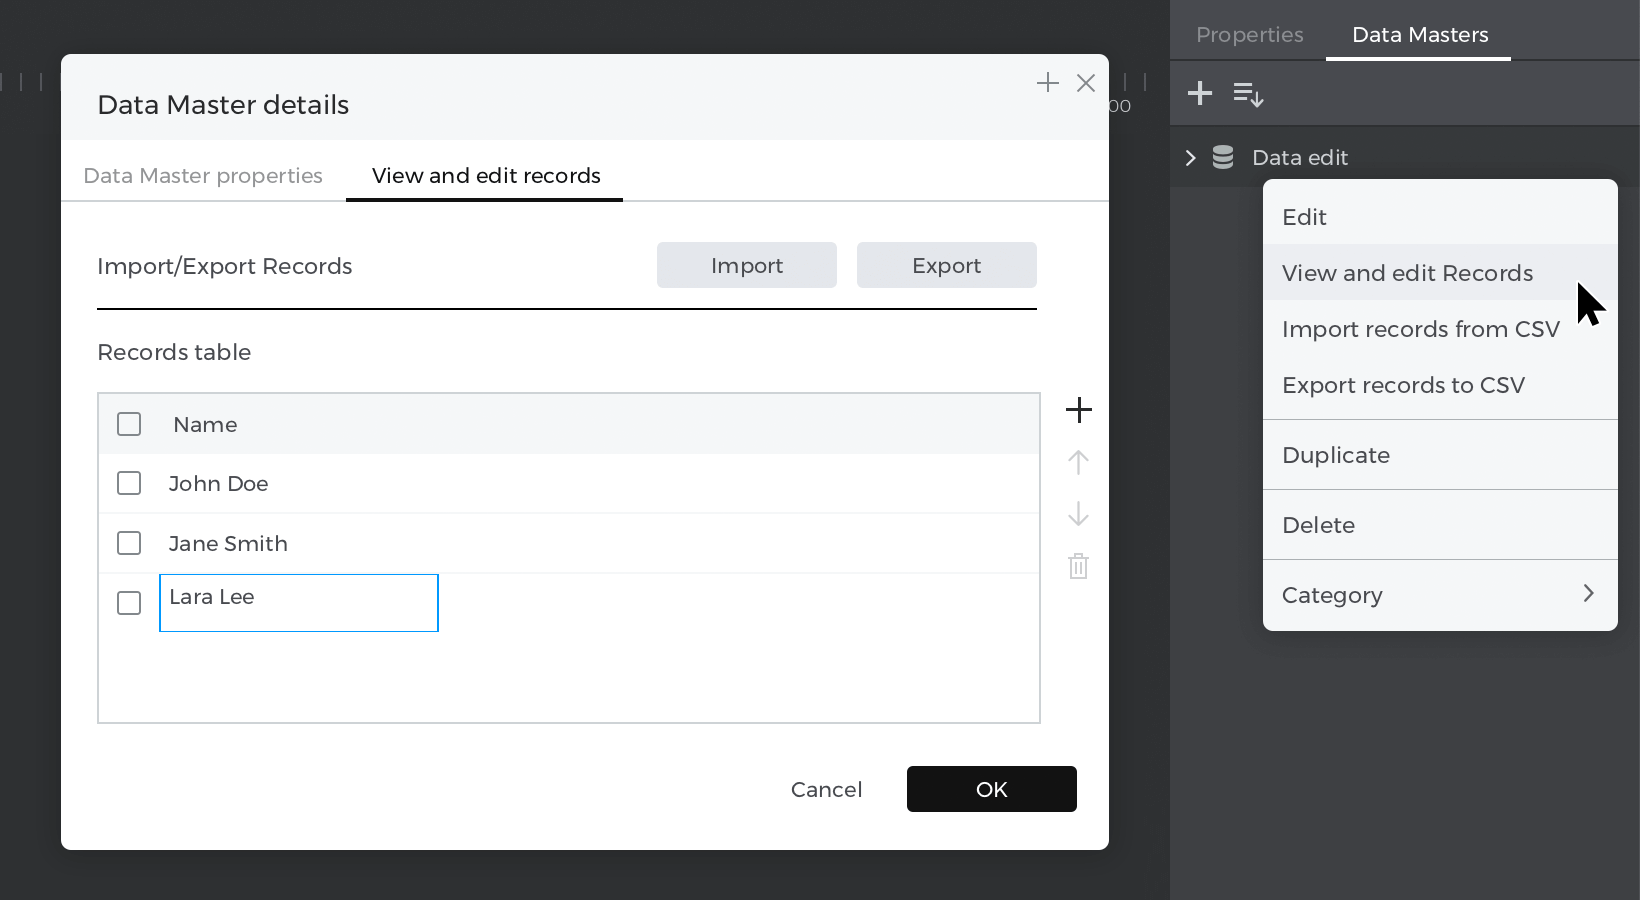
- Right-click on the “Data master” you’ve just created, select “View and edit records” to write your example data, and press “Ok”.

- Select “Data list” from the “Dynamic content” section and place it on the canvas; the “New Data List” window will be enabled; give your list a name, next choose the data master you have created before and select the attribute.
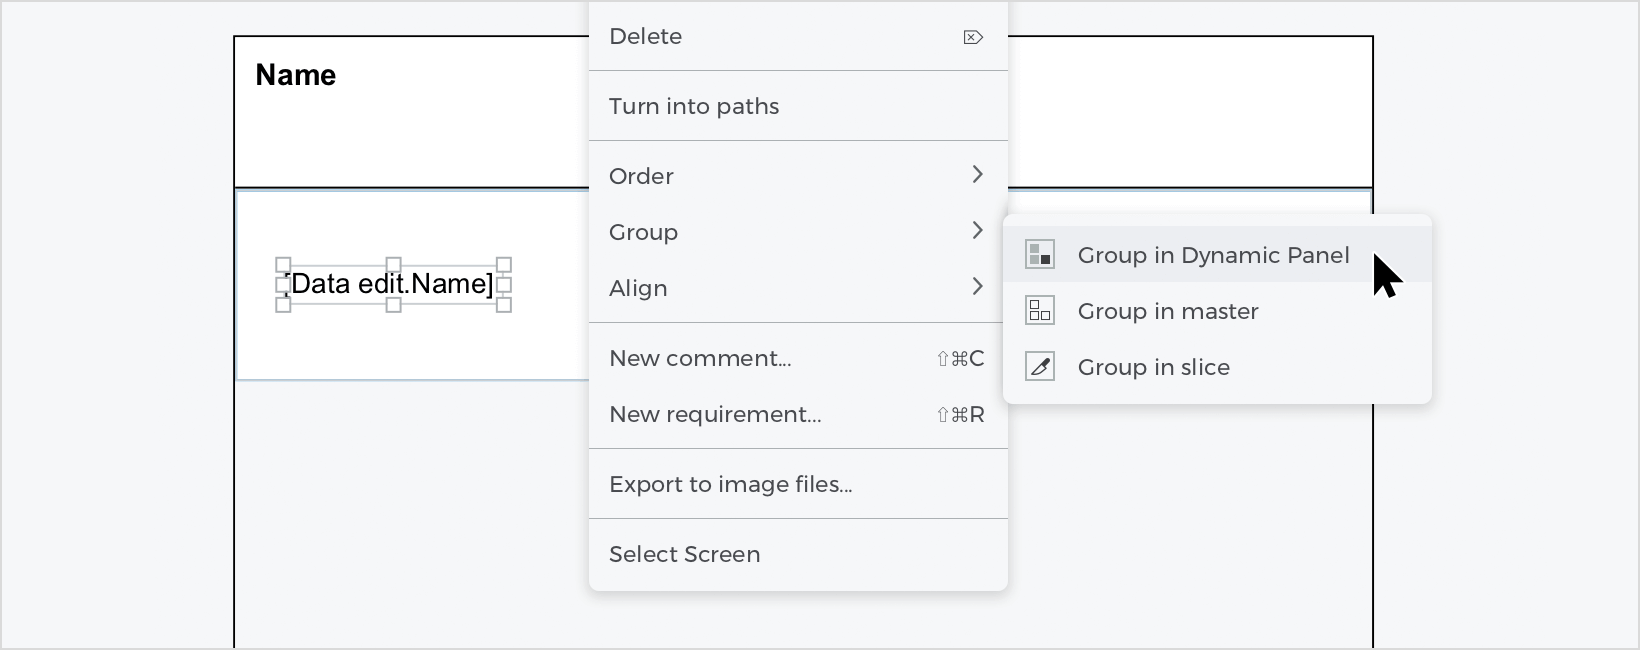
- Select the content of the row cell and right-click, hover over “Group”, and select “Group in Dynamic Panel”.

- Select the “Dynamic panel” and click on the “+” icon above to create a second panel.

- Place an “Input text field” from the “Interactive input fields” inside your second panel; hold command (Mac) or control (Windows) and drag the element inside. You’ll see a blue tint when you’re dragging.
For this example: Go to the Data Masters tab, expand it and drag the attribute “Name” on top of the input text, the attribute “Name” will be added, delete it so that we only have the input box. Resize the “Dynamic panel” to display the full input.
Events
Select the “Text” inside the first panel, go to the Events palette and click “Add event.” 
- In the dialog box, click on “Choose Trigger”, hover over the “Mouse” section, and select “on Click”.
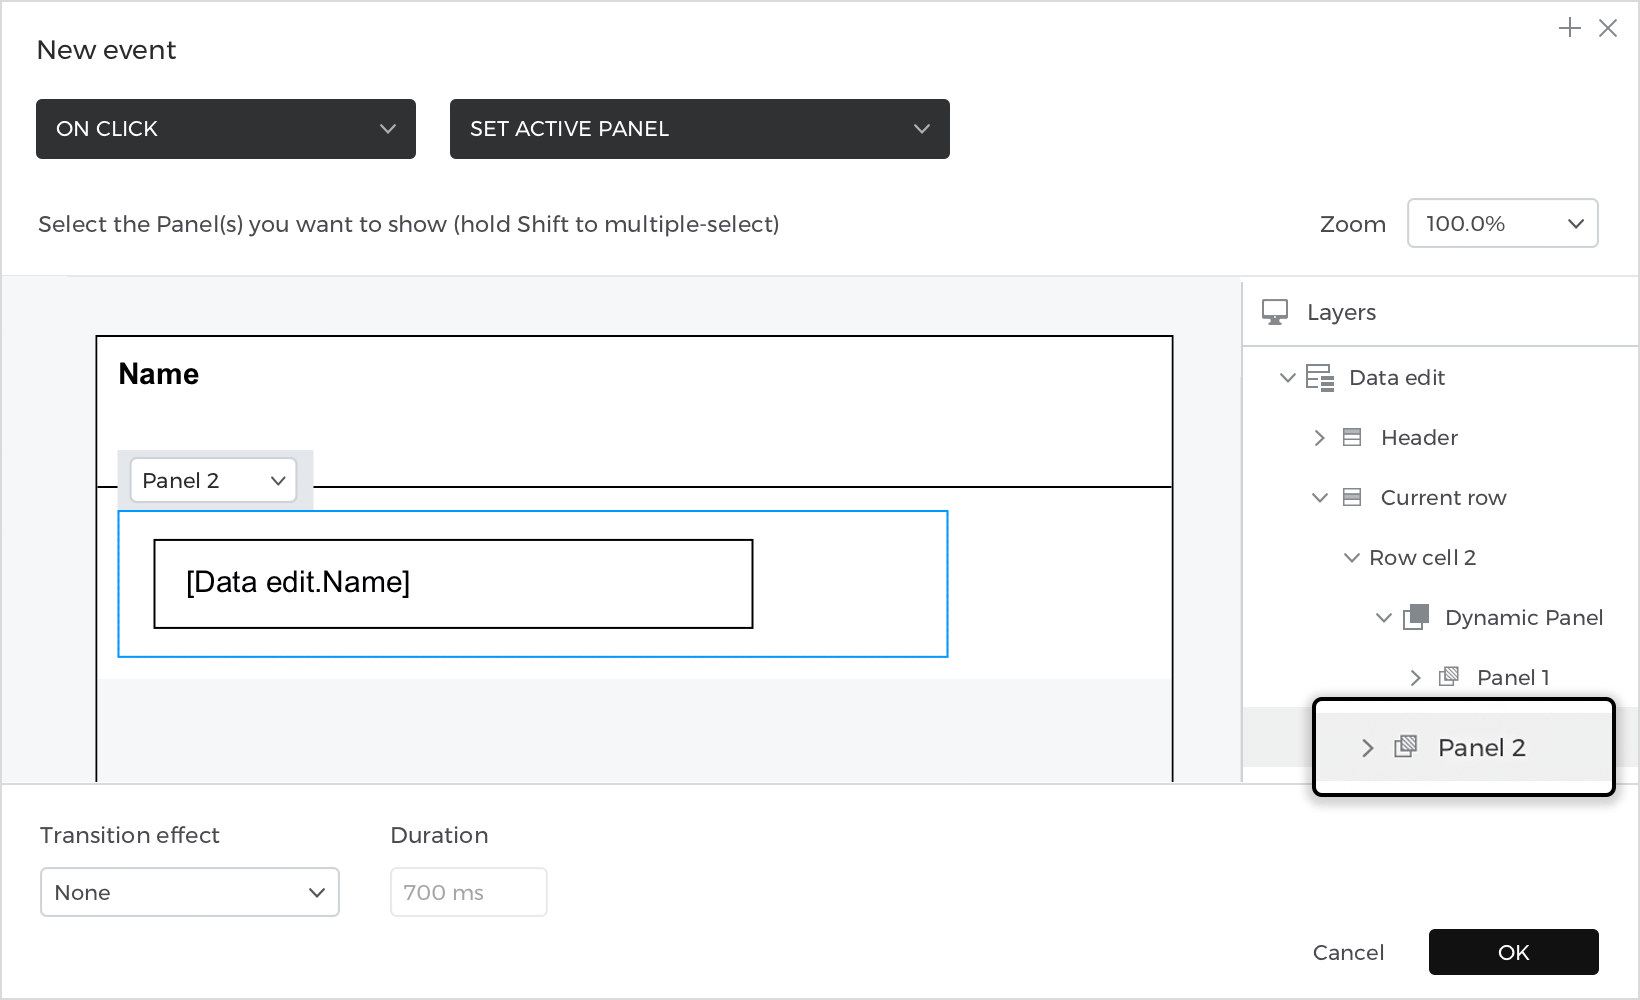
- In “Choose Action”, select “Set active panel” and click on panel number 2. Click “Ok” to finish creating your event.

Select the input inside panel number 2, go to the Events palette and click “Add event”. 
- Click “Choose Trigger” in the dialog box and select “on Change”.
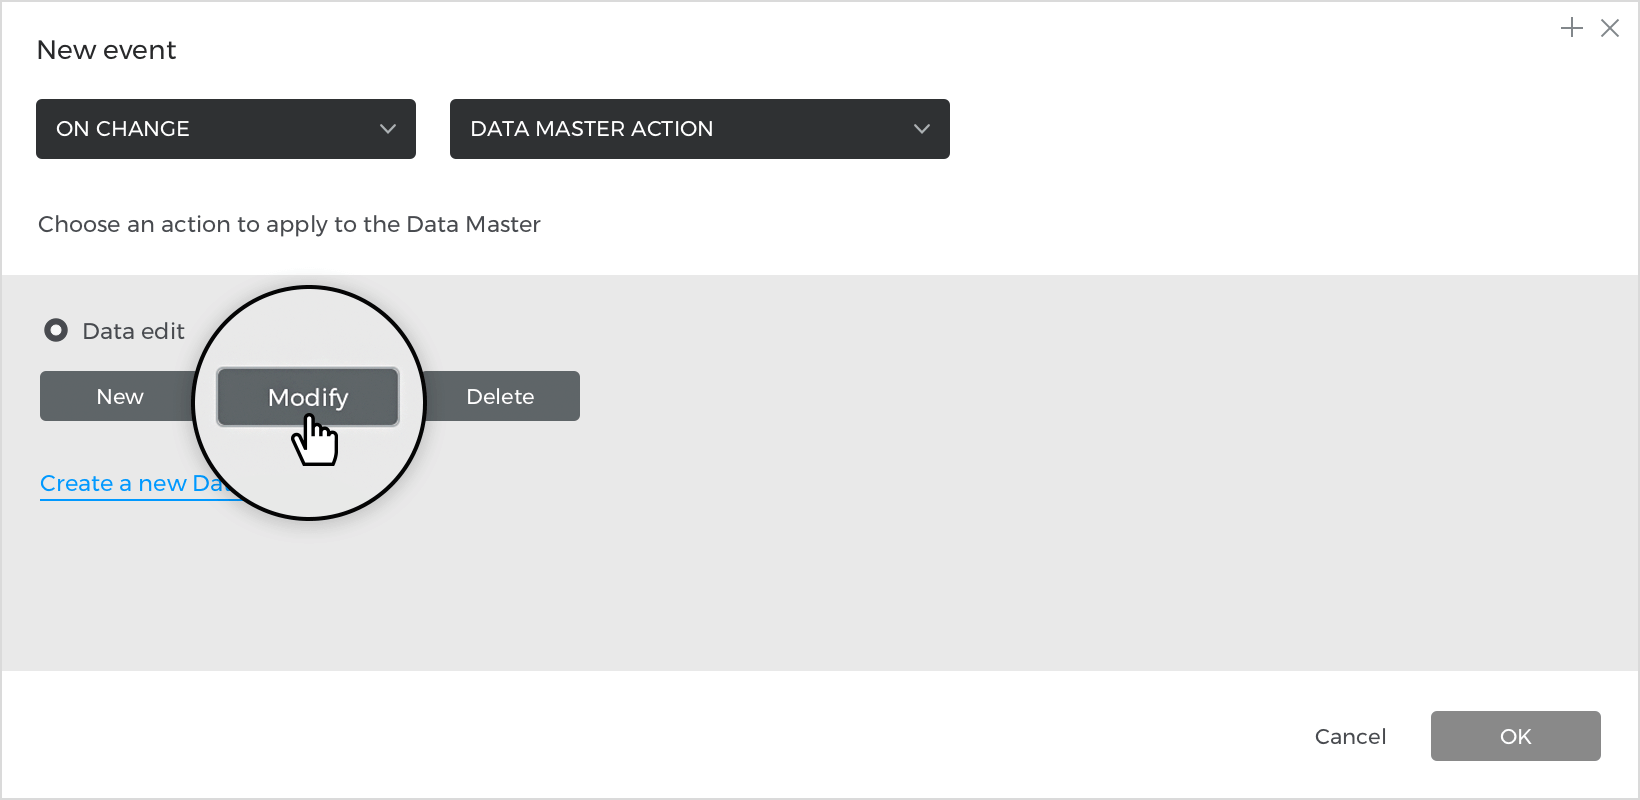
- In “Choose Action”, select “Data master action” and click on “Modify” to open the expression builder.

- In the first field, you will see the function “Modify” after all the areas you have in your data master.
- Drag “Current row” from the layers tab to the first field as a value after selecting the “Input text field” and place it in the name field as a value. Click “Ok” and “Ok” to finish building your event.
Go to the Events palette and click on the “+” icon to add a new event.
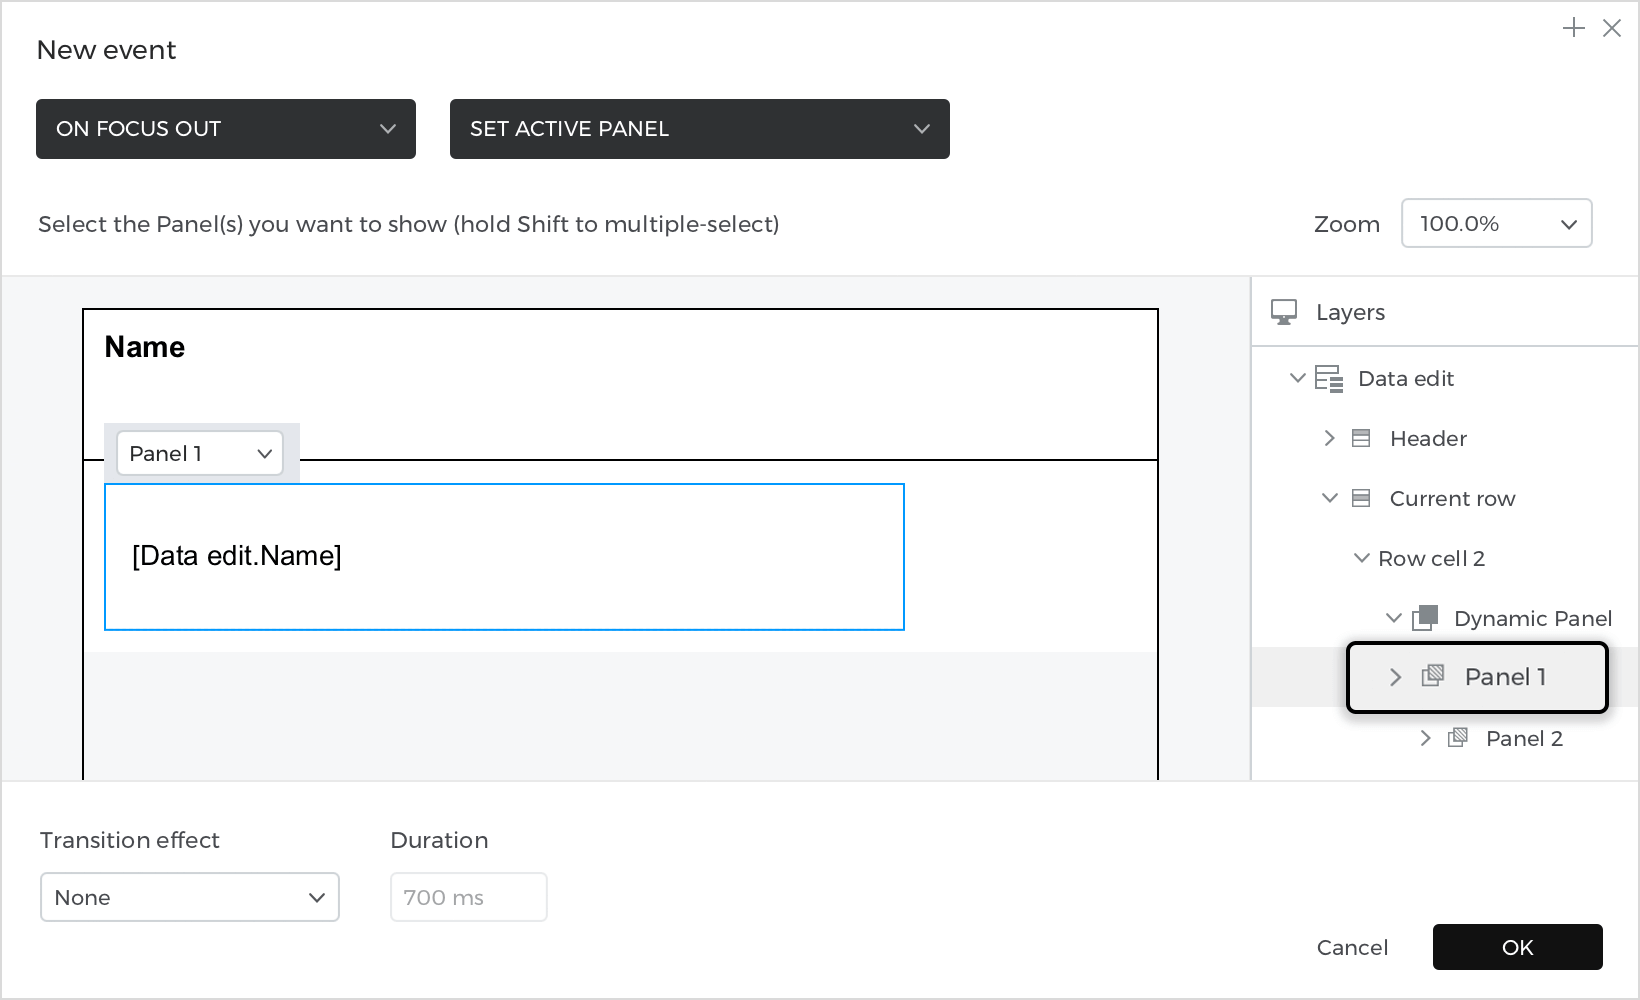
- In the dialog box, click on “Choose Trigger”, hover over the “Mouse” section, and select “on Focus out”.
- In “Choose Action”, select “Set active panel” and click on the panel number 1. Click “Ok” to finish creating your event.

Simulate your prototype.
