Shopping carts are a key part of any ecommerce. But what makes a cart have good conversion? Let’s break it down step by step.
Ecommerce has become an everyday part of life, growing rapidly alongside fierce competition. As online stores evolve, retailers must prioritize UX to stay ahead.
Design and prototype high-converting shopping cart UIs with Justinmind

What makes a great shopping experience? How much does UI optimization impact conversions? And most importantly, can businesses afford not to invest in it?
With online retailers continuously refining their ecommerce websites and UI design for better conversions, now is the time to catch up. And what better place to start than the shopping cart – a small but powerful element that can make or break a purchase?
In this post, we’ll break down essential shopping cart patterns, real-world examples, and practical design tips to help you create a seamless checkout experience.
If you’ve ever shopped online (which, let’s be honest, we all have), you’ve used a shopping cart UI. It’s that small but essential part of an ecommerce site that holds your selected items, keeps track of your order, and, when designed well, makes checkout effortless.
But not all shopping carts get it right. Some guide users smoothly through the buying process, while others introduce so much friction that shoppers abandon their carts before ever reaching checkout. A shopping cart isn’t just a functional element, it’s a critical part of the user experience that can make or break a sale.
Cart abandonment is one of the biggest challenges in eCommerce, with nearly 70% of online shoppers leaving before completing their purchase. The reasons vary, unexpected costs, forced account creation, slow load times, but it all comes down to one thing: frustration. If the shopping cart creates friction, users won’t think twice about leaving.
A well-designed cart keeps shoppers engaged by making it easy to access at any time without disrupting their browsing. It reduces friction by minimizing unnecessary steps, using clear calls to action, and making the process feel seamless. It builds trust by displaying total costs upfront, keeping shipping details transparent, and ensuring that users never feel lost. And with mobile shopping dominating online sales, a responsive UI is no longer optional, shoppers need a cart that works effortlessly across devices.
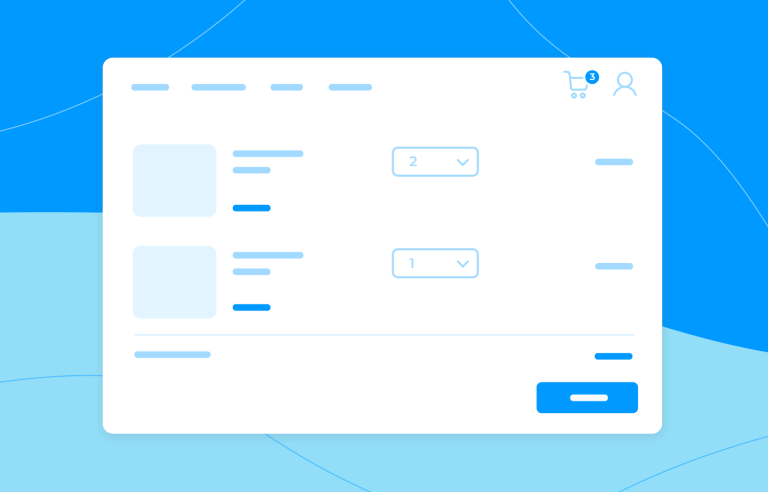
Here’s what makes an effective shopping cart design:
- Easy to find: a visible cart ensures users always know where to review their order.
- Minimal friction: fewer steps, clear CTAs, and an intuitive layout help users move smoothly toward checkout.
- Transparency: pricing, shipping, and additional costs should be clear from the start.
- Mobile optimization: with most online shopping happening on mobile, a seamless experience across devices is crucial.
Design and prototype high-converting shopping cart UIs with Justinmind
Not all shopping cart functions the same way, but before users even get to the cart, they often interact with features that enhance or shorten the journey. Some businesses want a seamless, distraction-free checkout, while others give customers time to review and adjust their order.
To clarify, there are two key aspects to consider.
These are not carts, but are part of the journey. These UI elements appear before a user reaches the full shopping cart but play a big role in shaping the experience.
A small overlay that appears when an item is added, giving a quick cart preview without leaving the page.
- Common in: fashion, electronics, and any store that encourages continuous browsing.
- Purpose: keeps users engaged and shopping by letting them check their cart without disruption.
- Not a full cart because: it’s just a preview, not where users fully manage their order.

A persistent cart panel (usually on the right) that stays visible while shopping. Unlike a mini cart, it can remain open and allow quick modifications.
- Common in: home goods, office supplies, and large order-volume businesses.
- Purpose: provides constant visibility of carts contents, making it easy to update quantities or remove items.
- Not a full cart because: it still acts as a preview rather than a dedicated checkout step.

A temporary pop-up confirmation that appears after adding an item, showing a brief cart summary with next-step options (e.g., “View Bag,” “Join for Free Shipping”).
- Common in: footwear, apparel, and brands focusing on loyalty programs or free shipping incentives.
- Purpose: reassures users that the item was added, highlights deals (e.g., free shipping for members), and encourages engagement.
- Not a full cart because: it disappears after a few seconds and doesn’t allow for full cart management.

Skips the cart entirely, sending users straight to payment.
- Common in: digital products, repeat purchases, and impulse buys.
- Purpose: eliminates unnecessary steps for repeat buyers, making purchases seamless.
- Not a full cart because: It’s part of the checkout experience, not the cart structure itself.
Every store has a full page cart page, but not every store uses mini carts, side carts, or one-click checkout. These are enhancements to the shopping experience, not different types of carts.

These are the true shopping cart designs that dictate how users review, modify, and finalize their purchase before moving to checkout.
The standard cart page where users see all items, make changes, apply coupons, and check totals before proceeding to checkout.
- Common in: almost every ecommerce store.
- Best for: stores with complex or high-value products that require a final review before checkout.
- Key features: full product details, quantity adjustments, shipping options, and a clear checkout button.

A cart that remains visible while users shop, usually on large screens.
- Common in: furniture, hardware, and B2B ecommerce where users need a running total.
- Best for: businesses that want users to always see their cart total and progress toward discounts.
- Key features: usually includes “You’re $X away from free shipping” message and allows for quick edits.

A cart that requires staged decision-making (e.g., selecting delivery times or product customizations).
- Common in: grocery stores, subscription boxes, or sites where users need to configure their order before checkout.
- Best for: stores with multiple fulfillment steps or extra customizations
- Key features: sequential steps that guide users through different choices before checkout.
Multi-step checkout guides users through the payment process, while a multi-step cart helps them configure their order before reaching checkout.

- Make the shopping cart easy to find: the cart should always be clearly visible, typically in the top-right corner of the page. Users expect it to be there, so placing it elsewhere can create confusion. Adding a visible item count and subtle animations can reinforce its presence and usability.
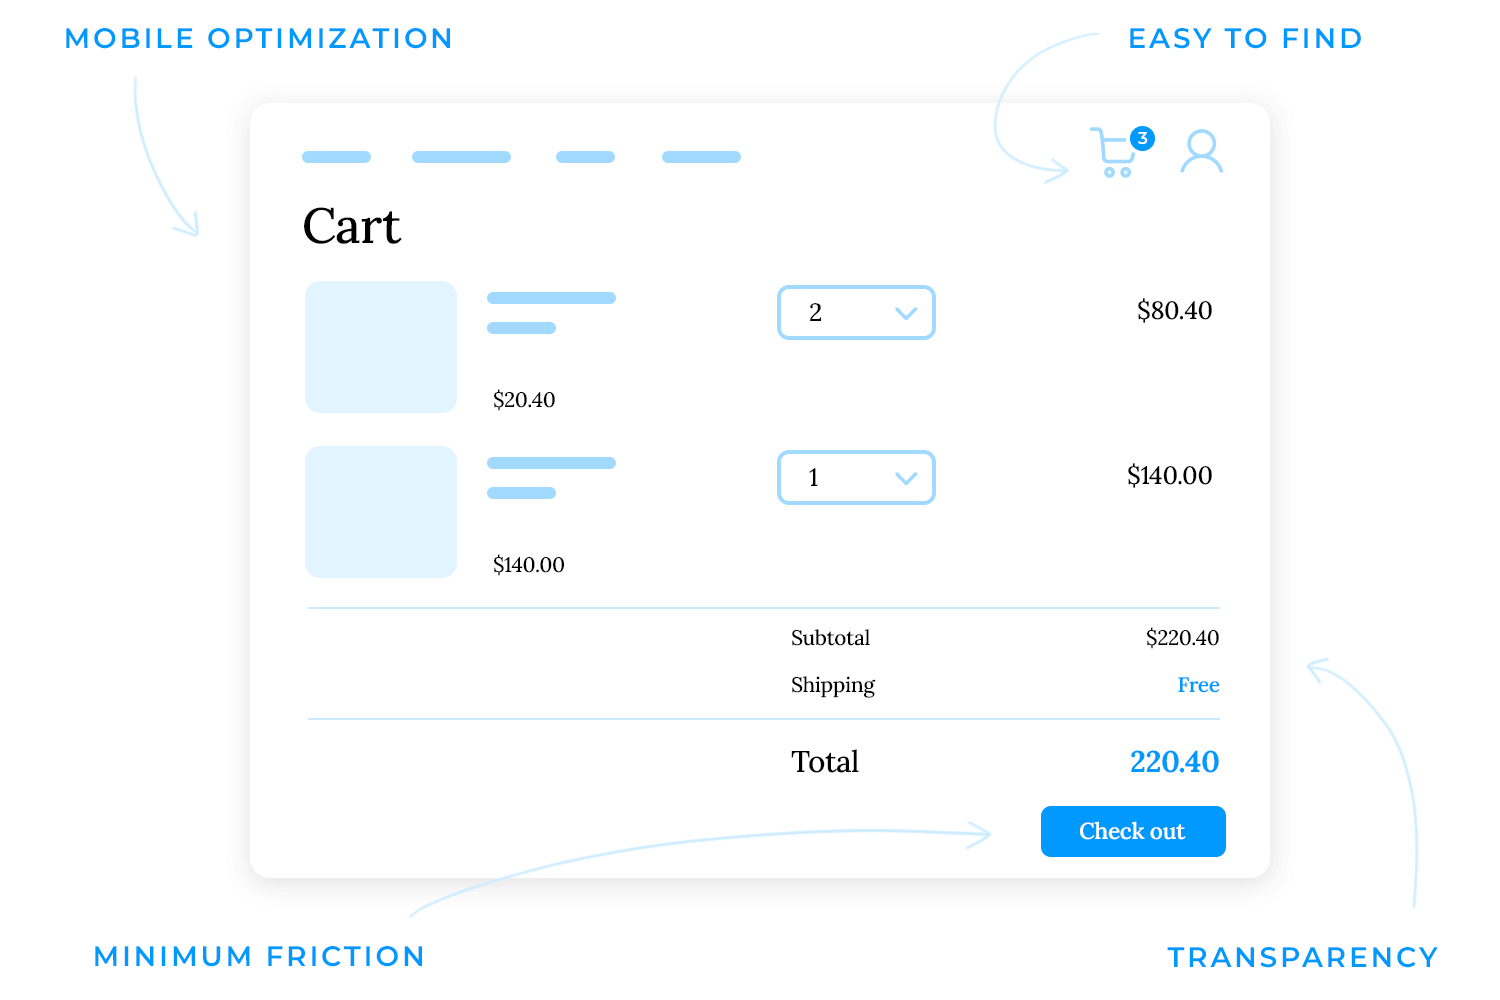
- Use a mini cart for quick access: a mini cart, or flyout cart, allows users to review their order without leaving the page, keeping them in the shopping flow. This is especially useful for stores with a broad product range, as it lets users stay engaged while keeping track of their selections. A well-designed mini cart should:
- Show a brief order summary, including product name, image, and price.
- Allow users to remove items or adjust quantities directly.
- Provide a clear path to checkout without extra steps.
- Show a confirmation when items are added: users should receive immediate feedback when they add an item to their cart. A confirmation overlay, a change in the cart icon, or a subtle animation reassures them that the action was successful. Without this, users may second-guess whether their item was added, leading to unnecessary frustration or repeated actions.
- Keep the full cart page simple and clear: when users reach the cart page, they should be able to review their order at a glance. A cluttered or overwhelming layout can create hesitation, increasing the chances of abandonment. A well-structured cart page should include:
- A list of selected items with names, images, prices, and quantities.
- Simple controls to update quantities or remove items.
- A clear order summary, including shipping fees and total cost.
- A prominent checkout button placed where users naturally expect it.
- Let users checkout faster: every additional step increases the risk of cart abandonment. The goal is to make checkout as quick and frictionless as possible. For frequent shoppers, one-click checkout or saved payment details can further speed up the process and encourage repeat purchases. To streamline the process:
- Offer guest checkout to avoid forcing users to create an account.
- Pre-fill information for returning customers when possible.
- Minimize form fields, asking only for necessary details.
- Use progress indicators to show how many steps remain.
Design and prototype high-converting shopping cart UIs with Justinmind
Even small design missteps can lead to lost sales. Here are some of the most common mistakes in shopping cart design and how to fix them.
- Making the cart hard to find: if users can’t quickly locate the cart, they’ll abandon their session. The cart icon should always be in a predictable location, preferably in the top-right corner, with a visible item count.
- Forcing users to create an account: requiring account creation before checkout adds unnecessary friction. Many users just want to buy without committing to an account. Offering guest checkout makes the process much smoother.

- Hiding fees until checkout: one of the biggest reasons for cart abandonment is unexpected costs. If taxes, shipping, or additional fees appear too late in the process, users will leave. Be upfront about pricing, include estimated totals on the cart page to avoid surprises.
- Too many steps in checkout: the more steps involved, the more chances users have to drop off. Streamline the process by reducing form fields, allowing autofill, and making payment options simple.
- No auto-save for abandoned carts: users often browse on one device and complete their purchase on another. If their cart doesn’t save automatically, they may not bother adding the items again. Persistent carts that save user selections across devices can recover lost sales.
- Confusing or overloaded layouts: a cluttered cart page with too many options can overwhelm users. Stick to the essentials, keep the design clean, and use clear calls to action to guide users through the next steps.
Designing a shopping cart for mobile users deserves special attention. Mobile commerce continues to grow (mobile now accounts for about 68% of ecommerce traffic), yet mobile carts see higher abandonment rates (around 85% on mobile vs – 70% on desktop on average).
The reasons often come down to a poor mobile UX; slow loading, hard-to-tap buttons, or cluttered interfaces on small screens. Here are some crucial tips for mobile shopping cart design to guarantee a smooth experience.
Mobile users are often on slower networks and are less patient with delays. A laggy cart can doom a sale. Optimize your mobile cart page for quick load times such as compress images, minimize scripts, and consider using skeleton screens or progress indicators for any dynamic content. Also, avoid forcing full-page reloads whenever possible; use AJAX to update cart contents without reload (e.g. when changing quantity). A fast, responsive cart boosts conversion by keeping users engaged (remember, every second counts on mobile).
Ensure tap targets are large enough and well-spaced. Tiny checkboxes or links that are hard to tap with a thumb will frustrate users. Follow guidelines like a minimum of 44px by 44px for touch targets. For example, use big plus/minus buttons for quantity on mobile instead of a small numeric input as this reduces tap error.

Likewise, the removed item “X” should be sufficiently large and not right next to other links. In one case study, a mobile cart design with large, thumb-friendly controls and plenty of spacing saw much better user engagement.
The best is to design for thumbs. Assume the user is holding the phone with one hand and placing actionable elements within comfortable reach (often towards the bottom of the screen for one-handed use).
On mobile especially, it’s helpful to have the primary CTA accessible without scrolling. If the cart has multiple items, users might have to scroll down to find the checkout button as they might not realize there’s more below the fold. A common solution is a sticky footer or bar on the cart page that displays the current total and a “Checkout” button that is fixed at the bottom of the screen.
This way, no matter how long the cart list is, the user can initiate checkout at any time. It also continuously reminds them of the next step. Many mobile sites and apps use a persistent bottom bar for checkout. It’s a proven pattern to increase conversion on small screens. Just be sure the bar isn’t too tall; it should reserve enough space for item content to be seen above it.

Screen real estate on mobile is precious. Strip out any non-essential elements from the mobile cart view. This means possibly hiding lengthy product descriptions (you can make product names clickable to view details if needed), collapsing optional promo fields by default, and avoiding any sidebar content (since on mobile it would push content too far down).
A clean mobile cart focuses on the core info: product, price, quantity, total. If you want to show product recommendations or banners, place them after the main cart content, or on a separate step, so they don’t crowd the initial view. Also, consider using accordions or tabs for sections like “Order Summary” vs “Shipping estimate” on the cart if that helps reduce initial clutter, just ensure it’s intuitive.
Optimize text size and readability: All text in the cart (product names, labels like “Total”, etc.) should be legible without zooming. Use a base font size that’s comfortable on mobile (typically 16px or larger). Also, use high contrast between text and background – gray-on-light-gray text that might look chic on a desktop could be very hard to read on a phone outdoors.
Especially for critical info like prices and the checkout button text, make it stand out. If your site uses any custom fonts, test them on mobile for readability. And avoid long paragraphs of text – if you need to convey info (e.g. a note about shipping delays), keep it brief and use clear icons or bullet points.
Mobile users navigate differently. Having the cart in a hamburger menu might work, but also think about using mobile-friendly patterns like a bottom nav bar that includes a cart icon (many mobile commerce apps/sites do this so the cart is one tap from the bottom of the screen).
During the checkout process on mobile, allow auto-fill and use mobile-friendly inputs (e.g. numeric keypad for ZIP code or credit card number). Essentially, optimize every element of the cart and checkout for touch and small screen workflow. Another tip: leverage mobile capabilities like camera scanning (for card numbers or gift card codes) if possible, to speed up the process. Although this is more on the checkout side, it’s part of a great mobile cart/checkout UX.

In summary, mobile cart design should emphasize speed, clarity, and finger-friendly UI. Mobile shoppers often have higher intent (they could be on their phone in a store or on the go), so if you cater to their needs with a fast, easy cart UX, you can significantly boost your mobile conversion rate.
Always test your mobile cart on actual devices – what looks fine on a desktop resized browser may behave differently on a phone. By focusing on mobile UX, you’ll tap into the huge segment of users who prefer shopping on their phones, and turn more of those taps into completed orders.
Design and prototype high-converting shopping cart UIs with Justinmind
Nothing beats seeing great shopping cart design in action. In this section, we’re looking at 20 examples of shopping cart UI that nail usability, conversion, or just overall great UX design. Some come straight from high-performing e-commerce websites, while others highlight best practices through UX design tools like Justinmind.
Whether it’s a slick mini cart, a frictionless checkout, or a clever upselling strategy, these examples show what works, and why.
This shopping cart UI keeps things minimal and distraction-free. With a clean, white background and simple black text, it prioritizes clarity and ease of use. The checkout button is bold and centered, making the next step obvious.
Instead of cluttering the page with too much detail, it sticks to the essentials: subtotal, shipping, VAT, and total price, all clearly laid out. A subtle message about free shipping and returns reassures users before they finalize their order.

In this example, the shopping cart takes a modern, minimal approach with a sleek pop-up design. Instead of navigating to a separate cart page, users get a quick overlay showing what’s inside. It keeps things efficient, product image, name, price, and a simple quantity selector, all in one glance.
The checkout button stands out with a vibrant purple hue, making it easy to move forward. The subtotal is clearly displayed, reinforcing transparency. This kind of mini cart (flyout cart) design works well for stores that want to keep shoppers engaged without interrupting browsing.
One thing missing? Options to remove items or save them for later. While it’s a smooth, visually appealing experience, adding more control could make it even more user-friendly.

This mobile cart design is sleek and user-friendly, making it effortless for shoppers to review and adjust their orders. Each product is clearly presented with a large image, name, price, and a straightforward quantity selector, allowing quick modifications without unnecessary friction.
A notable detail is the swipe-to-delete function, which keeps the interface uncluttered while still giving users full control over their selections. The bold checkout button at the bottom ensures a seamless transition to payment, reinforcing a smooth and hassle-free shopping experience.

This cart design is all about clarity and ease of use. Each item is neatly arranged with a crisp image, category label, and price, making it easy to scan and manage orders. The large plus and minus buttons ensure quick adjustments without frustration.
What really works here is the focus on hierarchy, important details stand out, while secondary elements stay subtle. The bold total and prominent payment button create a natural flow toward checkout, keeping the experience smooth and distraction-free. It’s a minimalist approach that doesn’t sacrifice functionality.

Here we have a cart that keeps things clean and to the point. The product images stand out with soft background colors, making it easy to scan items quickly. Instead of overloading the screen with details, it focuses on what matters; prices, quantity controls, and a clear total.
There’s also a subtle nudge toward spending more with the free shipping incentive. And that big “Next” button? It’s right where you’d expect it, making checkout feel effortless.

Here’s a cart that keeps things minimal yet functional. The product images are small but clear, making it easy to identify items at a glance. Quantity controls are neatly placed, and the swipe-to-delete action makes removing an item feel intuitive.
Instead of overwhelming the user with details, it keeps the focus on the essentials: products, total cost, and a checkout button that’s bold and hard to miss. The bottom navigation stays visible, offering a seamless way to explore other parts of the app without losing progress.

Amazon’s cart and checkout experience is famously optimized. The cart icon is always visible with an item count. When you add an item, Amazon often uses a side panel or a confirmation at the top (“Added to Cart”) with a prompt to checkout or keep shopping.

Their cart page itself is straightforward, but what really sets Amazon apart is the option to skip the cart entirely with “Buy Now with 1-Click” for eligible items. This express checkout, backed by stored payment and shipping info, has been shown to reduce friction and was a game-changer in ecommerce.
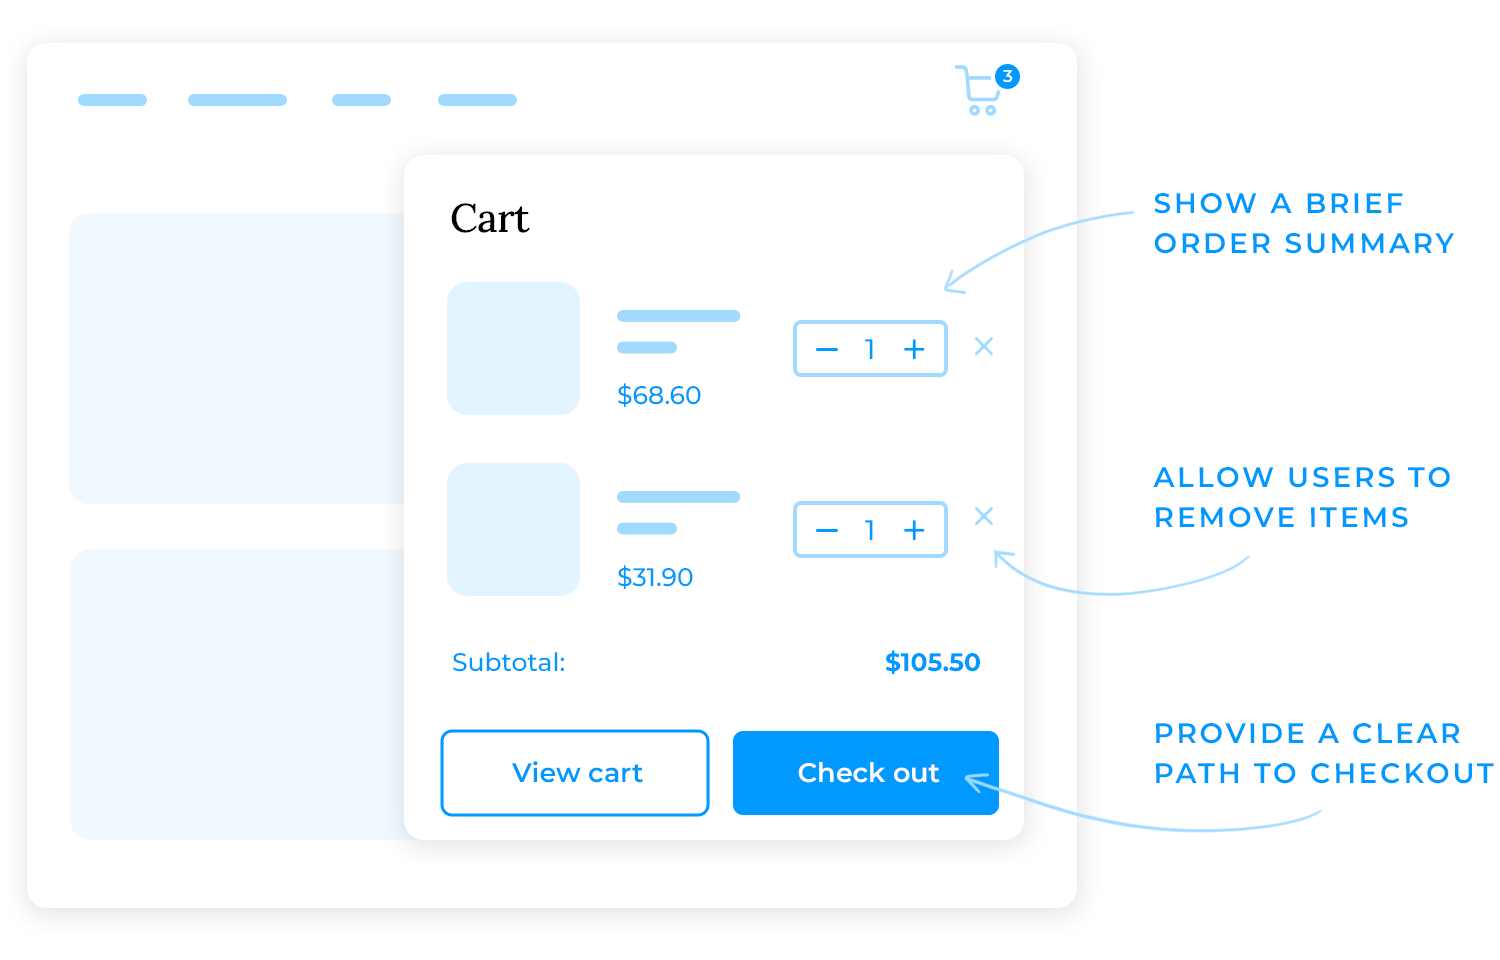
Walmart’s shopping cart keeps things simple and user-friendly, balancing clarity with functionality. The layout separates product details on the left and the order summary on the right, making it easy to review purchases. Each item includes a clear image, price, savings, quantity selector, and quick actions like “Save for later” or “Remove”.
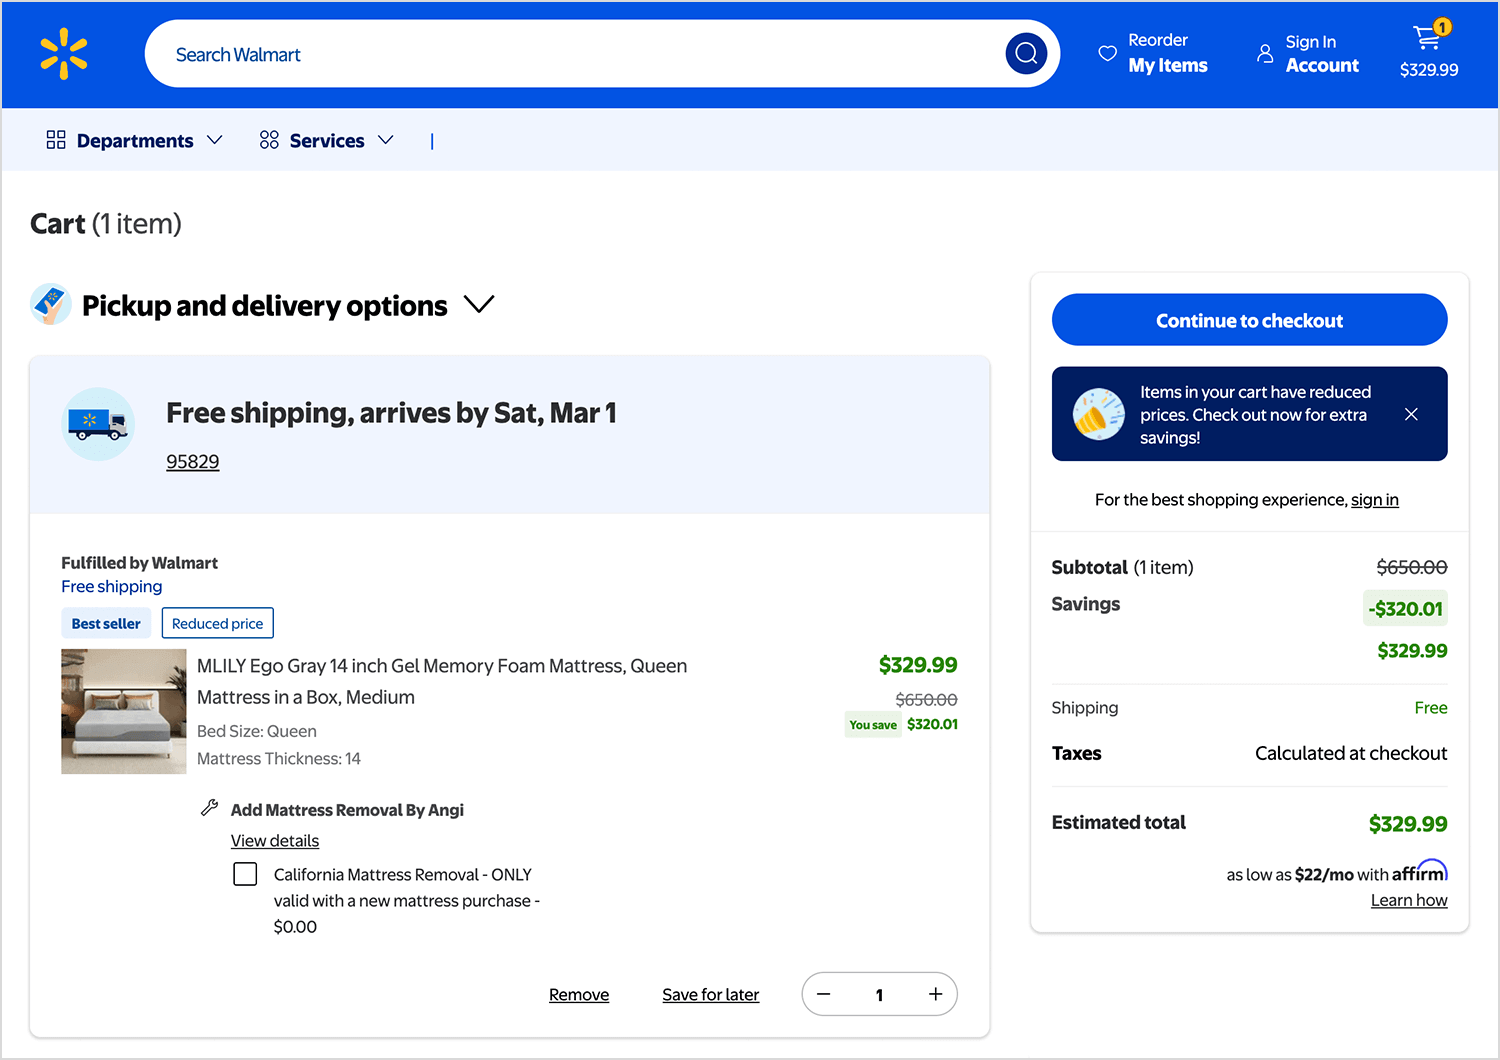
What makes Walmart’s cart stand out is its seamless pickup and delivery integration, users can easily choose shipping or store pickup for each item. Discounts and savings are highlighted upfront, and checkout remains the primary focus with a bold “Continue to checkout” button. Unlike Amazon, there’s no express checkout, but the streamlined design ensures a frictionless experience for all shoppers.
Target’s shopping cart stays true to its clean, user-friendly design. The cart icon shows item count and opens a full cart page when clicked. Discounts are clearly listed, with original and new prices side by side.
Stock status and free shipping alerts create urgency, while two checkout buttons, at the top and bottom, make the process seamless. Users can also toggle between store pickup and shipping with ease, keeping the experience smooth and intuitive.

Victoria’s Secret keeps the cart experience sleek and seamless. Instead of a separate page, the shopping bag keeps users engaged with a clean, structured layout. Shoppers can quickly adjust quantities, edit items, or save them for later without friction.
Payment options like PayPal and Venmo are prominently displayed, and the checkout button stands out with its signature soft pink. A subtle sign-in prompt encourages returning users to access previous selections, making the process smooth and intuitive.

ASOS keeps its cart page clean and straightforward, making it easy for shoppers to review their order. The layout clearly separates the cart items from the order summary, ensuring key details stand out. The checkout button is bold and prominent, while accepted payment methods are displayed just below.

A “Save for later” option gives users flexibility, and shipping details are kept simple. ASOS also highlights its Premier delivery service, encouraging users to consider faster shipping options before checking out.
Nike brings some marketing savvy into its cart UI. On the checkout page, the focus is on a clean, structured design that streamlines the purchase process. Users can easily choose between shipping and pickup options, reinforcing flexibility.
Nike also lists an estimated delivery date helping reduce uncertainty and giving shoppers confidence in when to expect their order. The order summary clearly displays subtotal, estimated shipping, and tax upfront, so there are no surprises at checkout.

While this page doesn’t include urgency messaging or Nike Membership perks, it keeps the checkout experience efficient and user-friendly, making it easy to complete a purchase without distractions.
Sephora knows how to make the checkout process feel just as luxe as the shopping experience. Right away, they highlight perks like free standard shipping for Beauty Insiders and hassle-free returns, giving shoppers a reason to feel good about their purchase.
The cart layout is clean and straightforward, with clear delivery options, from same-day delivery to store pickup, so customers can choose what works best. Estimated delivery times are displayed upfront, reducing any guesswork.

On the right, the order summary keeps things simple, showing the subtotal and estimated costs, while flexible payment options like Klarna, Afterpay, and PayPal make checkout even easier. While this cart doesn’t display Sephora’s famous free sample selection or Beauty Insider reward redemptions, it still delivers a seamless experience that reassures and guides shoppers toward completing their order.
Etsy’s cart UI balances transparency and simplicity, even with its unique challenge—each order involves independent sellers with their own pricing and policies. Here, the cart highlights key details: seller name, item discounts, and free shipping, ensuring buyers know exactly what they’re getting.
A clear breakdown on the right shows the shop discount applied, tax, and total, along with multiple payment options like PayPal, Google Pay, and credit cards. A subtle “Mark order as a gift” option adds a personal touch, and a checkout button keeps the next step obvious.

Though this image doesn’t show multiple sellers, Etsy typically groups cart items by shop to streamline transactions while maintaining clarity for users.
B&H Photo Video takes a smart approach to its cart experience, especially for tech buyers who often need accessories or protection plans. Here, we see a clean cart layout with the main item (a Ricoh Theta Z1 camera) prominently displayed. Users get options for warranty protection right in the cart, offering extended coverage for an additional fee, an upsell that feels helpful rather than pushy.

On the right, there’s an estimated shipping and tax section, allowing users to calculate costs before committing to checkout. The “Begin Checkout” button stands out, ensuring a clear path forward. Additionally, users can save items for later or remove them, keeping flexibility in their shopping process.
While this cart doesn’t display accessory upsells directly, B&H typically integrates relevant add-ons, making sure professionals get everything they need in one purchase.
Allbirds, known for its shoes, uses a clean and minimal checkout design that prioritizes ease of use. Instead of a side menu cart, this checkout page keeps things simple and conversion-focused. At the top, express checkout options like Shop Pay and PayPal make it easy for returning customers to complete their purchase quickly.

The cart summary on the right maintains Allbirds’ signature clean aesthetic, listing the selected item with a thumbnail, name, and price. A “You might also like” section suggests complementary products with inline add-to-cart buttons, making it effortless for users to increase their order value.
While the free shipping message isn’t visible in this view, Allbirds typically reinforces incentives at key points in the cart and checkout flow. The layout stays uncluttered and highly functional, ensuring a seamless purchasing experience.
Lululemon’s cart experience keeps things sleek and efficient while reinforcing urgency. At the top, a red notification box warns users that items are selling fast, nudging them toward checkout. This subtle FOMO tactic (fear of missing out) encourages faster decision-making.
The cart layout is clean and structured, listing items with thumbnails, names, prices, and quantity selectors. Each product includes a free shipping and returns message, reassuring customers about their purchase. The high-contrast red “Continue to Checkout” button stands out prominently, followed by a PayPal quick checkout option for added convenience.

While this view doesn’t show additional product recommendations, Lululemon typically integrates them in a non-intrusive way. The combination of urgency messaging, a clear checkout flow, and free shipping incentives makes for a frictionless shopping experience.
A fitness apparel brand, Gymshark keeps its cart experience clean, modern, and frictionless while prioritizing ease of checkout. Right at the top, express payment options like Shop Pay, PayPal, and Google Pay allow users to skip form-filling and check out in seconds.
The cart summary on the right keeps things simple, listing the item, price, and a discount code field for easy savings. Below that, a referral link encourages new users to take advantage of potential perks, reinforcing loyalty incentives. The shipping cost isn’t displayed upfront, prompting users to enter their address first, a strategy that can drive commitment before potential drop-off.

While this view doesn’t show Gymshark’s free shipping progress bar or upsell recommendations, those features typically appear when a user is below the shipping threshold. The design is streamlined and functional, making checkout as smooth as possible while nudging users toward quick payment options.
Solo Stove makes checkout feel effortless. Right away, you’re met with express payment options like PayPal and Apple Pay, so if you’re in a hurry, you can skip the usual form-filling and get straight to payment.
The order summary keeps things simple, with a clear product image, price breakdown, and an easy-to-spot coupon field in case you have a discount code. One thing missing? Shipping costs aren’t shown upfront, which might encourage users to continue further in the process to see their final total.

Overall, it’s a straightforward, no-frills checkout experience that focuses on speed and ease, making sure nothing gets in the way of completing your order.
Here’s our last example, and it’s a good one! Smyths Toys keeps checkout simple and to the point. The cart page gives you an easy side-by-side comparison of delivery options, whether you want home delivery or prefer free Click & Collect within 2 hours. That kind of flexibility is a big plus for toy shoppers, especially during busy seasons.
Another smart touch? Clear pricing with no surprises, the total is displayed prominently, and delivery fees (if any) are shown upfront. And if you’re ready to go, checkout is just a tap away, with a big green button or the option to speed things up with Google Pay.

Smyths makes sure the cart stays fast, clear, and friction-free, perfect for parents grabbing last-minute gifts or kids convincing their parents to check out quickly!
Designing the perfect shopping cart UI is an iterative process. Once you’ve applied the best practices and drawn inspiration from examples, it’s vital to prototype and test your shopping cart design to iron out any kinks.
Before writing code, build a realistic prototype of your cart and checkout flow using a prototyping tool. For instance, with a tool like Justinmind, you can create an interactive mockup of your cart including the mini cart interactions, error messages, etc. This allows you to experience the flow as a user would and catch issues early. You can simulate adding items, going to the cart page, and transitioning to checkout.
Prototyping helps in communicating the design to stakeholders as well. Everyone can try the cart UX and give feedback. Try prototyping different variations (e.g., one version with a mini cart vs one that goes straight to a cart page), and see which feels more seamless. Because a shopping cart often has edge cases (empty cart, max quantity reached, out-of-stock scenarios), building those states into a prototype ensures you design all necessary UI messages. It’s much easier to adjust a prototype than re-code a live cart, so invest the time here. As Justinmind’s team would say, prototype, communicate, validate.

The true secret behind successful testing of your shopping cart lies in the conversion. Before the testing can begin, you have to decide where your standards are. What do you hope to achieve with this version of the design? We recommend always having a clear line, a goal you mean to reach with the design.
Once you have a prototype or a working version, test it with real users. Conduct a usability test where you ask participants to perform tasks like “Add two products to the cart and complete a purchase” and observe where they stumble. Do they find the mini cart icon easily? Do they understand how to remove an item? Are they surprised by anything on the cart page? You might discover, for example, that users aren’t noticing a promo code field because it’s hidden, or that they’re confused by the wording of a button. Such insights are gold – they allow you to refine the design.
Testing can be done in person or remotely. You can also use analytics on a live site: track where people drop off in the funnel. If many users add to cart but don’t proceed further, that’s a red flag. Perhaps the cart page or button isn’t compelling them to continue.
Tools like Hotjar or Google Analytics can show drop-off rates and even recordings. In one case, TomTom used user recordings and found a hidden issue in their checkout process that, once fixed, helped boost conversion by up to 491%. This underscores how testing and finding pain points can directly improve your bottom line.
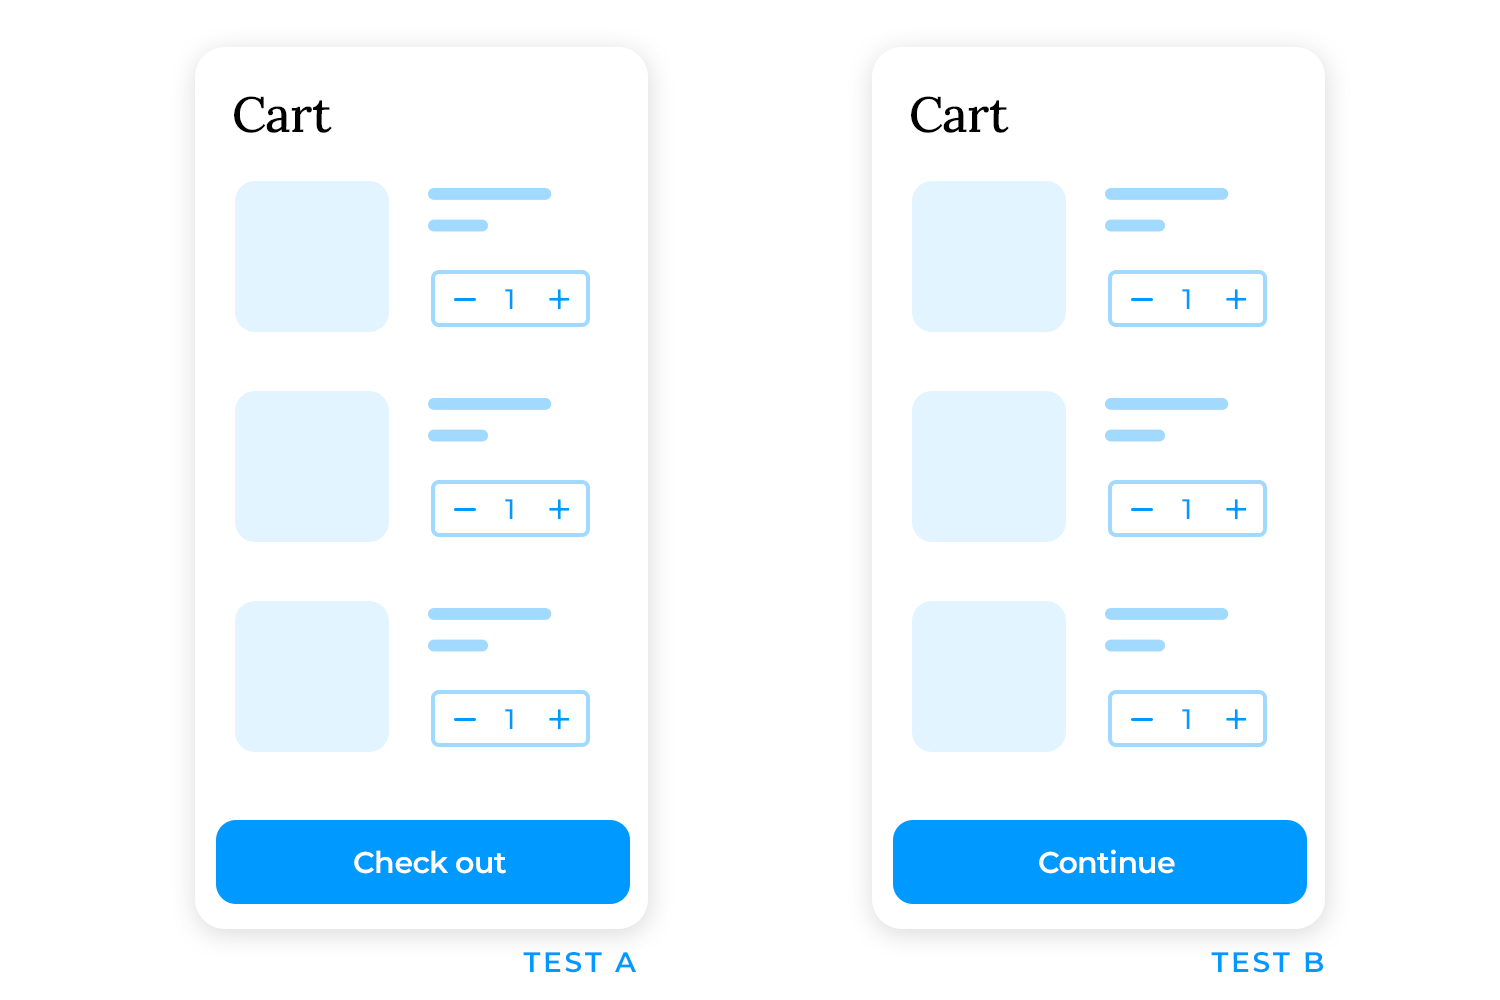
For more mature optimizations, consider A/B testing different cart designs or features. Unsure if a one-page checkout would outperform your current multi-step? Test it with a segment of users. Perhaps a test showing estimated taxes in the cart vs not showing (though best practice is to show, data might convince any skeptics).
Always use a statistically sound approach and make sure you’re measuring meaningful outcomes (completion rate, revenue per user, etc.). For example, you might A/B test a new copy on your checkout button (“Checkout” vs “Continue”) to see if a clearer label improves conversion. Or test a progress indicator on checkout vs none. Continuous improvement is key even if your cart is good, there’s usually something to tweak or update as user expectations evolve.
Don’t forget to test the performance and technical aspects. A cart might be beautifully designed but if it’s slow or buggy, users won’t tolerate it. So test on various devices and browsers. Does the mini cart work on Safari on an iPhone? Does the Android web view handle the animations? Are there any crashes when removing items rapidly? Also, simulate high loads (many items in cart, or many concurrent users) to ensure the cart can handle Black Friday rush, for instance.
Incorporate feedback loops. After any major change to the cart UI, monitor metrics and gather user feedback (even something as simple as an on-page survey: “How was your shopping experience today?”). Shoppers might point out new issues or express delight at improvements – both are valuable. Treat the cart as a living part of your site that you refine over time.
Sometimes UX best practices change or new technologies become available (e.g., widespread use of digital wallets or “trust badges”), and you’ll want to update your cart accordingly.
Remember, even small tweaks in the cart can have large impacts on conversion. Testing helps validate which changes are positive. As Forrester research noted, a well-optimized UX can potentially raise conversion rates up to 400% and the cart is a prime candidate for such optimization.
By prototyping and testing, you ensure that your UI shopping cart design isn’t just theoretically good, but works effectively for your actual users, leading to a smoother experience and better sales outcomes.
Design and prototype high-converting shopping cart UIs with Justinmind
The shopping cart may be one of the last steps in the buying journey, but it’s certainly not the least. In fact, it’s a make-or-break moment for online shoppers. A great shopping cart UI keeps the experience smooth, transparent, and reassuring, whereas a poor design can undo all the hard work that got the user this far.
Continuous improvement is essential. Through prototyping, usability testing, and performance optimization, you can refine your shopping cart design to maximize conversions and meet evolving user expectations.
Ultimately, a great shopping cart UI fades into the background, allowing users to glide effortlessly through checkout. So, invest the time to get your shopping cart design right. It’s the bridge between a shopper’s intent and a successful sale. By applying the best practices we’ve discussed, you’ll be well on your way to reducing cart abandonment, boosting conversions, and creating a great checkout experience, which is what you want as a UX designer.
Now, it’s your turn to evaluate your own cart UI and see where you can apply these insights. Happy optimizing, and may your new cart design roll your conversion metrics straight into the checkout success zone!